In this guide, we’ll show you how to set up a video wall in the OptiSigns app using the Video Wall app and an OptiSigns Pro or ProMax Player, or a makeshift video wall.
- What’s Needed?
- Video Wall Capabilities
- Purchasing a Video Wall Add-On
- Setting Up a Video Wall App
- Setting Up the OptiSigns Pro Player
- Makeshift Video Walls
Video walls are a common request from OptiSigns customers. They can be used in numerous industries, including retail, manufacturing, entertainment, command and control environments, broadcasting, education, and far more.
Now, using the power of the new OptiSigns Pro and ProMax Player and the Video Wall App, it’s possible to push your digital signs to multiple screens and use them as a cohesive video wall easier than ever.
What’s Needed?
To set up a video wall for use in the Video Wall app, you’ll need:
- An OptiSigns subscription - Standard Plan or Higher
- An OptiSigns Pro Player or ProMax Player
- A purchase of an OptiSigns Video Wall add-on ($25/monthly/device)
- Up to four screens (ProMax) or three screens (Pro Player)
- HDMI/other connectors
| NOTE |
| The Video Wall App can only be used with the OptiSigns Pro or ProMax Player. It cannot be used in any other capacity. |
| A NOTE ON PRICING |
|
The license and Video Wall app apply to the player, not the number of screens. In other words, you will only need one license per video wall, regardless of the number of screens used. Example: say you have a Pro Plus plan license at $15/month. You then want to make a 4-screen video wall using a ProMax Player. You buy a single Video Wall add-on. This lets you run a 4-screen video wall at $40/month. That same $40/month could be used to run a 2 or 3 screen video wall as well. |
Video Wall App Capabilities
With the Video Wall app, you can push content to multiple screens at once. There are a few things to keep in mind:
- The ProMax Player is our most recommended option if you're looking to use a video wall with digital signage. It allows for 4K video per screen and our full range of options, with up to four screens usable in any orientation.
- The Pro Player can handle up to 3 screens at a time, at 1080p max resolution.
- You are unable to output to multiple screens at once without the Video Wall app.
Video Wall Orientations and Pixel Sizes
2 Screens:
3 Screens:
4 Screens:
Purchasing a Video Wall Add-On
In order to use the Video Wall app, you’ll need to buy a Video Wall add-on license. Each license works with a single OptiSigns Pro Player and costs $25/monthy/device.
There are two ways to purchase a license.
The first is to navigate to your Subscription Plan tab:
Once there, scroll down to the Video Wall Add-on section and choose Add Screen:
You’ll be prompted to add this add-on to your subscription.
The second way is to pair your subscription directly with your screen. To do this, you’ll need to hook up your OptiSigns Pro Player to at least two screens.
Now, set up your screen through the Edit Screen option:
Navigate to Advanced → More, then find the Video Wall option and hit Activate:
You’ll be prompted to add this add-on to your subscription.
| NOTE: The Video Wall option will only appear if an OptiSigns Pro Player is attached to the screen. |
Setting Up a Video Wall App
To use a video wall, you’ll need to set it up through the Video Wall app. To do that, navigate to Files/Assets → Apps, then select Video Wall Content:
You’ll be prompted to select the number of screens and their orientation:
| NOTE |
| 4 Screens are only available using the OptiSigns ProMax Player. The regular Pro Player can handle 2 or 3 screens. |
Once selected, you’ll have a couple options: you can build a basic video wall, or create a continuous one.
Creating a Basic Video Wall
To create a basic video wall, select the number of screens and their orientation. Once you’ve done so, you’ll see the following:
Notice that each screen is known as a Zone, mapped to the HDMI ports on your OptiSigns Pro Player. Make sure your screens are arranged in the order displayed here, as it cannot be changed.
There are a few options to note:
Name - The name of your Video Wall App.
Zone Name - The name of the designated zone. Depending on which option you picked, there will be two or three zones. These default to the name of the HDMI port on the OptiSigns Pro Player.
Type - The Type of content to display. You’ll choose from Asset, Playlist, or Schedule, then choose the piece of content you want to display.
Clicking the Gear icon will lead you to this screen:
Audio Zone - Lets you choose which screen the audio will come from. This can be All, or any one of the HDMI ports you've assigned a screen to.
Primary Zone - Setting one of your screens as a Primary Zone will provide a better experience or smoother content transition when you need to coordinate contents in different zones and put use the video wall app in a playlist.
- For example, if the primary zone is utilizing Playlist A, Playlist B and its video wall asset will respect the duration of Playlist A's asset. It will only transition to the next item when the asset in the Primary Zone's playlist is complete, rather than follow the duration setting of the video wall asset placed in Playlist B. This is a great way to avoid videos being cut off early.
For more information on these zones, see our guide on Advanced Playlist Item Playback Control and Campaign Management.
Should you choose content and assign it to your screens in this way, your video wall will function almost like a split screen, with each screen displaying different content or repeating images:
Merging Screens to Create a Continuous Image or Video
To create one continuous image, the screens will need to be merged.
To do this, click the Merge Screens button:
Then, select the screens you’d like to merge:
These two screens will now be merged, and considered the same Zone:
You can continue merging screens if you have a third to create a video wall that looks like the image below, with one continuous image.
In order to unmerge screens, select the merged screens, hit the Merge Screens button again, then hit the two arrows going out from each other:
This will separate the screens into separate Zones once again.
Once you’ve finished setting up the Video Wall app, hit Save. This will store it as an Asset. As an Asset, you can push it to a screen directly, add it to a Playlist, or schedule it to play at any time.
Creating Custom Resolutions
Sometimes, you might have an unusual resolution, or want to chain multiple screens together to register as a single screen.
To support this, it's possible to input a custom resolution. Here's how.
First, find your Pro Player screen with the Video Wall add-on applied. Go to Advanced → More → Video Wall. You may need to activate it. When activated, this will appear:
Click Change, then hit any option. A resolution should be displayed, like this:
To input a custom resolution, simply replace the numbers in the box with the resolution you would like to display.
Forcing Rotation to Portrait or Landscape
If you have a non-standard video wall setup, you may wish to force the display to either Portrait or Landscape mode. To do this, find your Pro Player screen with the Video Wall add-on applied. Then, go to Advanced → More → Video Wall. You may need to activate it. When activated, this will appear:
Click Change, then hit any option. Your chosen resolution should be displayed. Then:
For Portrait:
Append ":P" to the end of the resolution string:
For Landscape:
Append ":L" to the end of the resolution string:
Your video will now display in the requested mode.
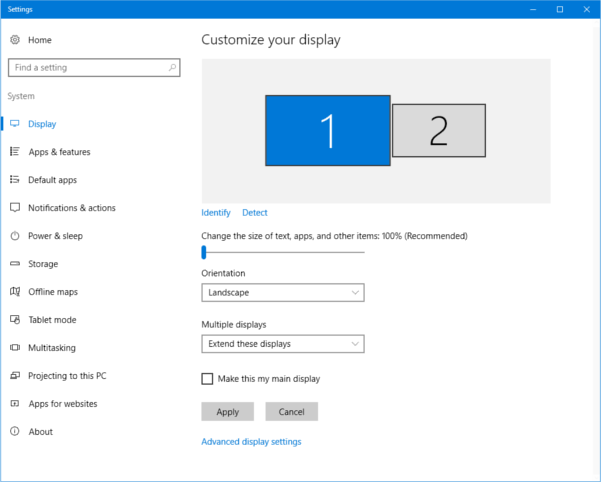
Setting Up the OptiSigns Pro or ProMax Player
With a Video Wall license purchased and app made, it's now time to set up your video wall! To do this, simply arrange the screens in the same manner you've arranged them in the app, then plug in the appropriate HDMI or DP port.
ProMax Player
When setting up a video wall using a ProMax player, begin with the HDMI outlets and go from left to right. HD-A-1 will correspond to screen 1, HD-A-2 will correspond to screen 2, HD-A-3 will correspond to screen 3. Then the DP port will correspond to screen 4. If using three screens, the DP port is not needed; if using two, then the DP and HD-A-3 ports are not needed.
Remember: in most setups, the player will be facing outward, with the AV ports facing toward the screens.
Pro Player
HD-A-1 goes to your farthest left or most vertical screen, HD-A-2 goes to your middle screen, and HD-A-3 goes to the farthest right or bottom screen. If using just two screens, HD-A-3 is not needed.
Sync Playing Multiple Pro Players for Larger Video Walls
Using Sync Play, it's possible to create a continuous Video Wall across an unlimited number of screens.
To do this, you'll need:
- A Pro/ProMax player for each screen
- A video chopped up in pieces divided by the number of screens you wish to display across
We're working on a comprehensive guide on how to create a sync play video wall using OptiSigns. Check this space later for that information.
Makeshift Video Walls
If you don't own an OptiSigns Pro or ProMax player and want to make a very rudimentary video wall, there are a few options available.
Using a Player with Multiple Video Outputs - Windows, Linux, Raspberry Pi
You can use OptiSigns on Windows, Linux, and Raspberry Pi to make simple video walls.
The solution is simple, you will need a player with multiple video outputs.
For example, Raspberry Pi 4 can output 2 screens, you can buy a PC running Windows, and Linux with multiple HDMI, Display Ports output and easily make up 2-6 screens video wall.
Just download OptiSigns player for Win, Linux, and Raspberry Pi (version 4.2.9 or higher required).
Arrange your screens setup as extended and set the position of the screens.
Run OptiSigns app, and resize the player to fill up across all the screens. This can be done in two ways:
- Dragging the app to fill up all screens (least precise method)
- Fixing your screen size using the Override Win Size & Position (recommended)
Option 1: Dragging the App to Fill Up All Screens
This is a simple, basic technique whereby you simply drag the OptiSigns app window to fill up your extended video wall display, like below:
This is the easiest method, but does not provide precise control over how large your screen will be. Remember to hide your taskbar, to make OptiSigns fill in all the screens.
Option 2: Fixing Screen Size Using the Override Win Size & Position Option (Recommended)
To get the most precisely optimized video wall, you'll want to follow these steps. First, in your OptiSigns app, click on the Hamburger Menu.
This will open up a list of options. Disable Fullscreen on Startup:
Now, scroll down to the Override Win Size & Position option:
Once selected, you'll see this screen:
Set the width and height to match the resolutions of your screens.
Next time your system starts up, OptiSigns will auto-start up and remember the size, and position.
That's it!
You now have a video wall with OptiSigns.
Using a Video Wall Controller Distributor
You can purchase a video distributor like:
NIERBO 2x2 HDMI Video Wall Controller or iseevy 9 Channel Video Wall Controller
Then you can plug in FireStick, or any other player running OptiSigns and have it as an input source for the Video distributor.
Note that if your wall is big, you should use a Video Controller with 4K support, and use FireStick 4K or equivalent devices to output 4K high-resolution content, which will help the quality of your video wall.
If you have feedback on how to make the how-to guides better, please let us know at: support@optisigns.com
That’s all!
If you have any additional questions, concerns or any feedback about OptiSigns, feel free to reach out to our support team at support@optisigns.com.